Once power enters the relay the internal contacts connect. Basic wiring diagram for voltage sense system 2 1 3.

Campervan Split Charging A Helpful Illustrated Guide
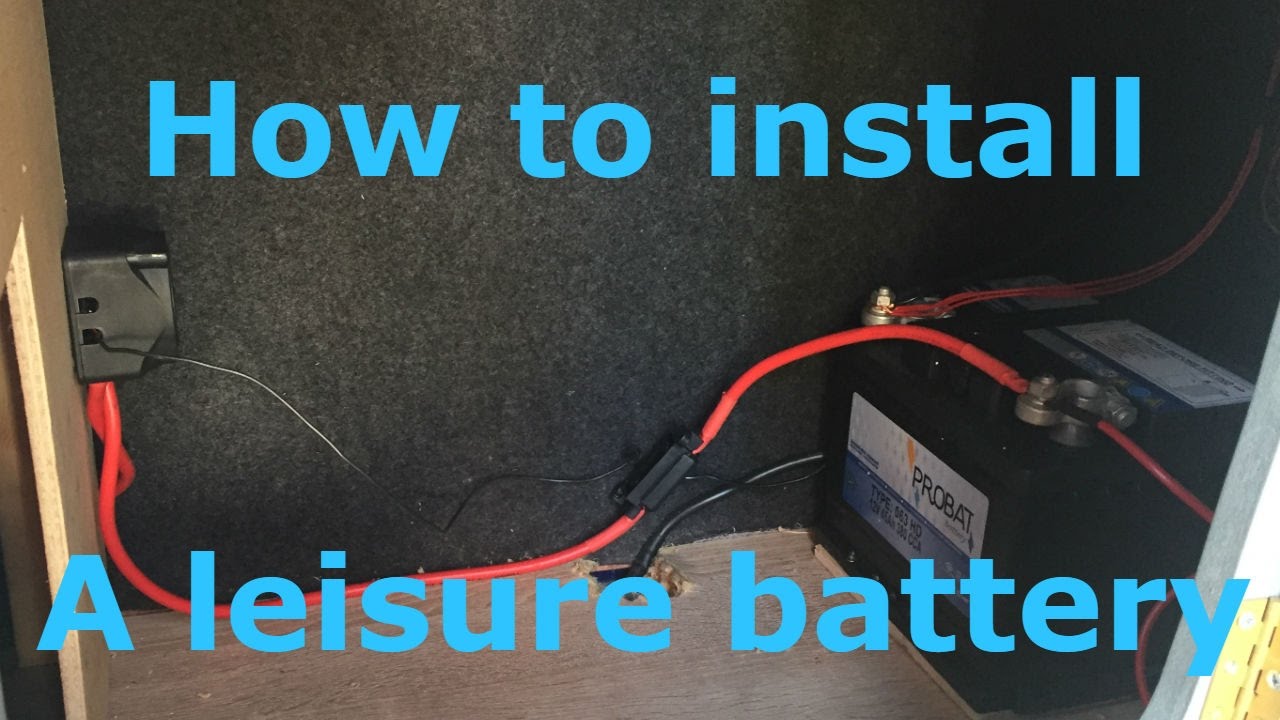
Split charge relay wiring diagram. Includes pictures and info on wiring crimping fusebox split charge relay and mains 12v electrics and wiring for my campervan conversion. Inside a split charge relay there is a solenoid coil that energises once it receives a 12v signal. So the common solution is to fit one or more auxiliary batteries often referred to as leisure batteries in vehicles or house batteries on boats that are used purely to power those items not related to the starting of the engine. A typical 12v campervan split charge wiring diagram that connects the starter battery to the leisure battery. There is finally a light at the end of the tunnel. Actually theres not because.
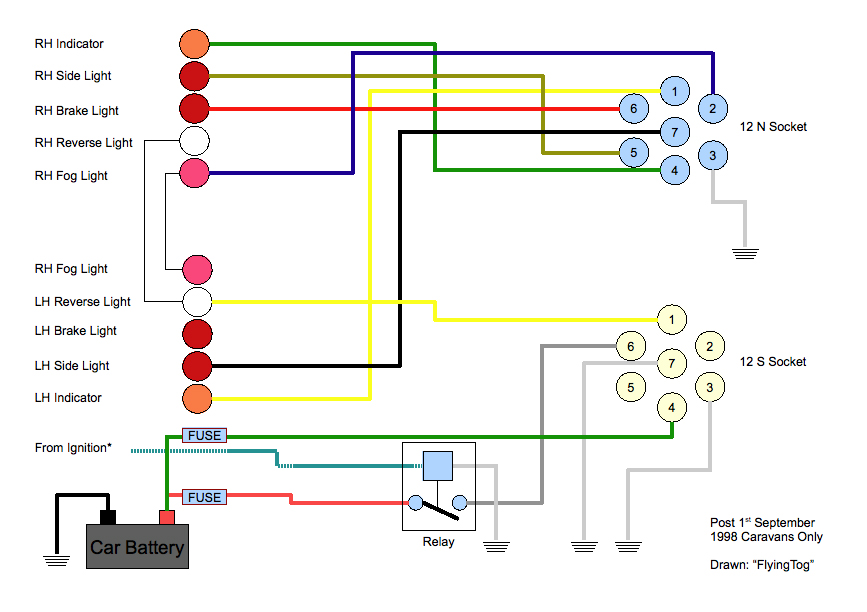
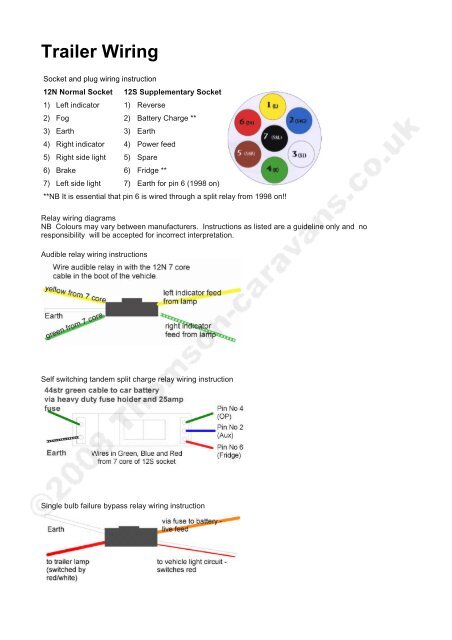
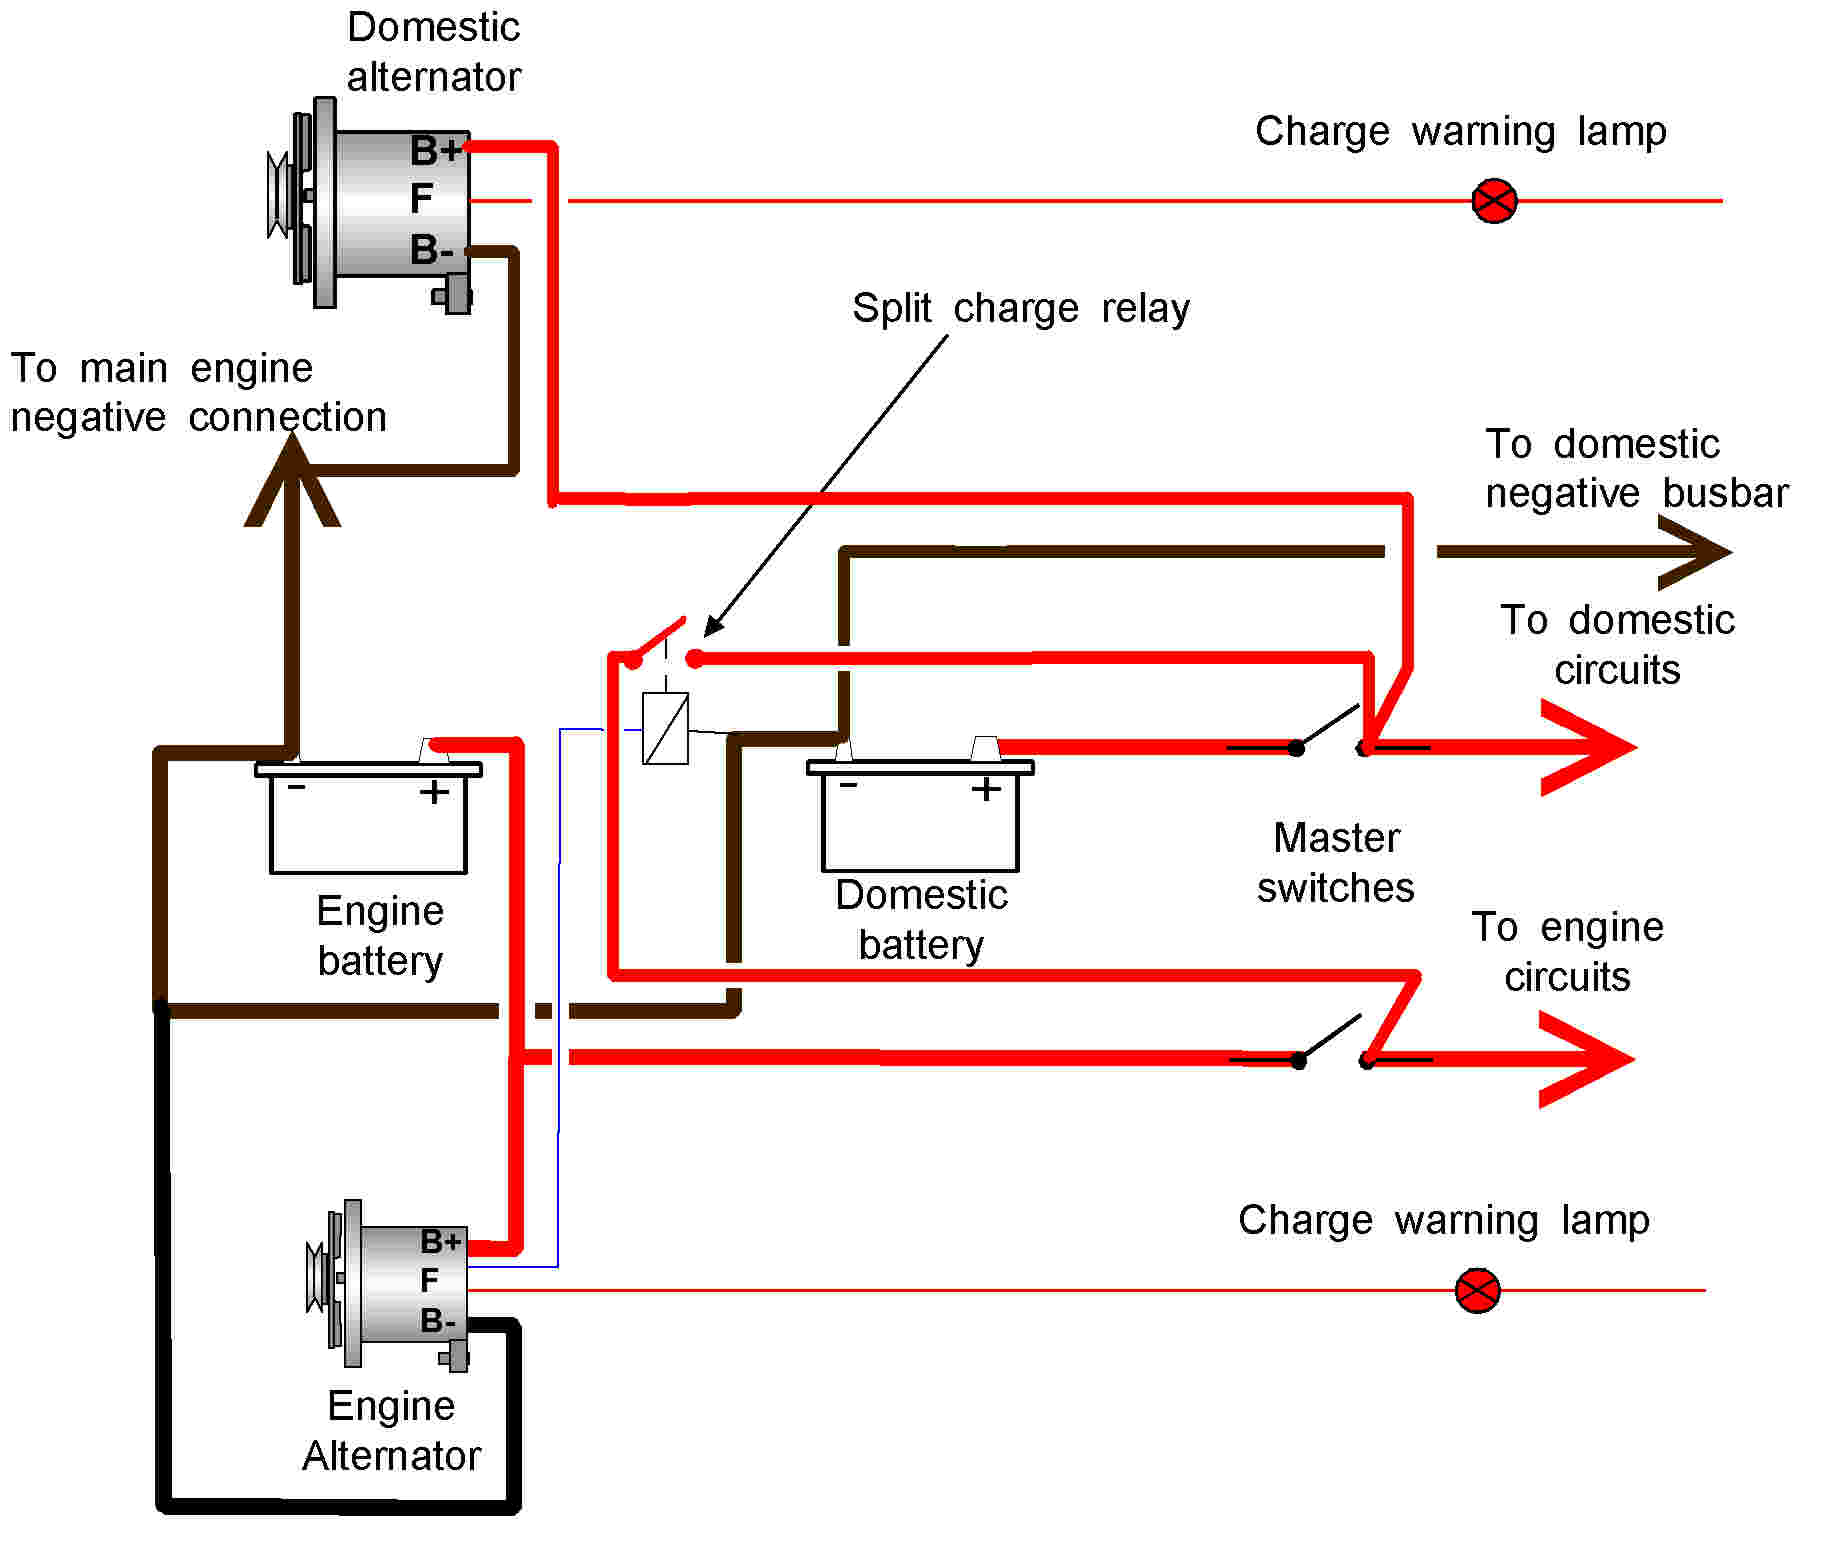
With the screws provided attach fuse box 1 and fuse box 2 as close to the main starter. Ensure this cable is thick enough to carry the maximum charging current of your alternator. A typical split charge system using a voltage sensing relay. Fit a fuse to one of these cables rated. To fit a split charge relay first connect a 16sqmm red cable from the positive terminals of each battery bank to the large studs on the relay labelled 87 and 30. Campervan electrical installation wiring diagram google search.
Existing wiring not shown for clarity. A split charge relay works like an intelligent switch. Typical split charge system wiring diagram. The split charge relay switch will on and allow currant to flow through to the leisure battery when the voltage rises above 132volts. Phase one of the campervan wiring is now complete hurrah. Here is a very basic split charge wiring diagram you would find aboard a campervan.
Gallery of Split Charge Relay Wiring Diagram