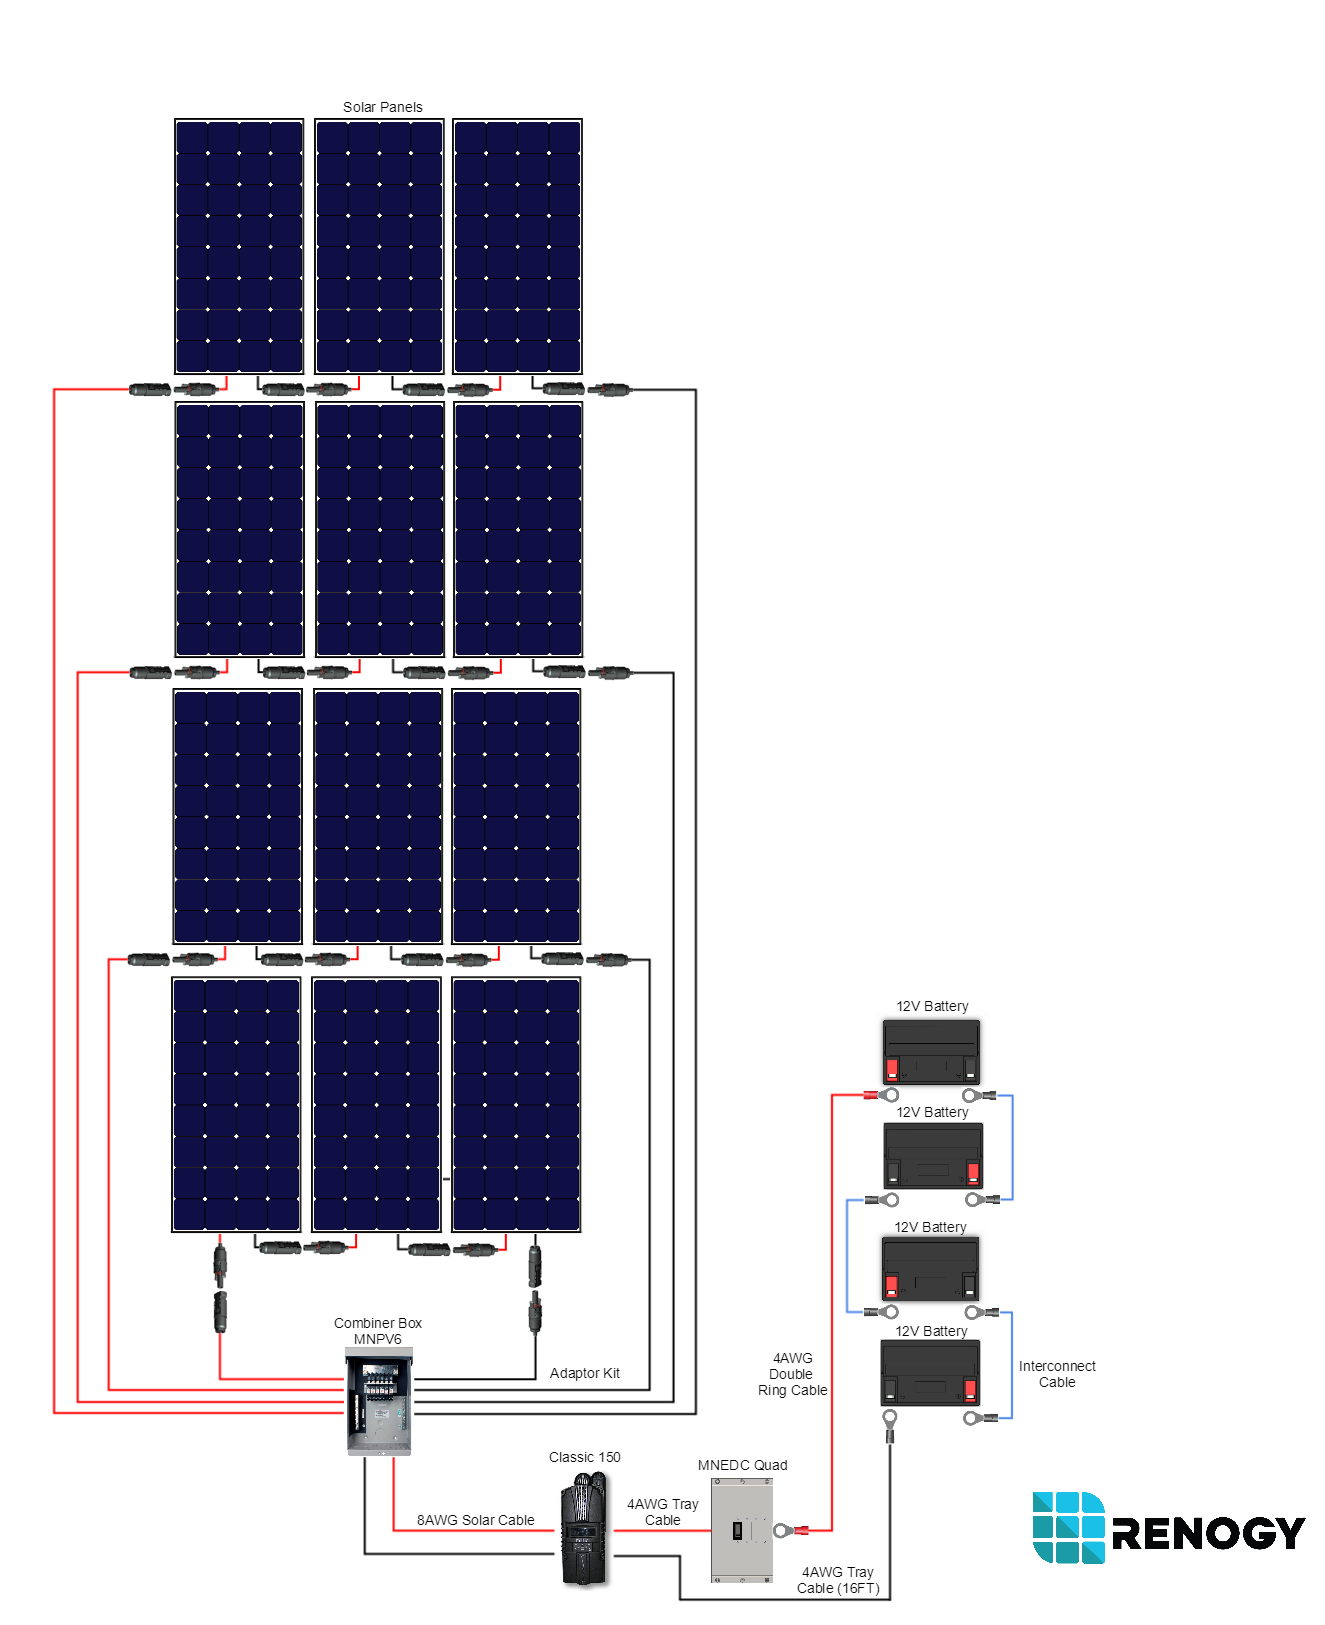
Thr renogy 400w solar system. Otherwise the structure wont work as it should be.
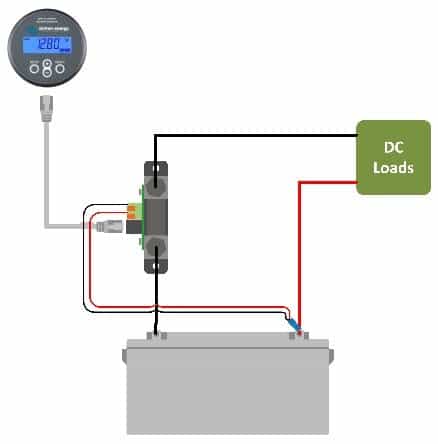
Installing Battery Monitor For Camper Van And Rv Solar
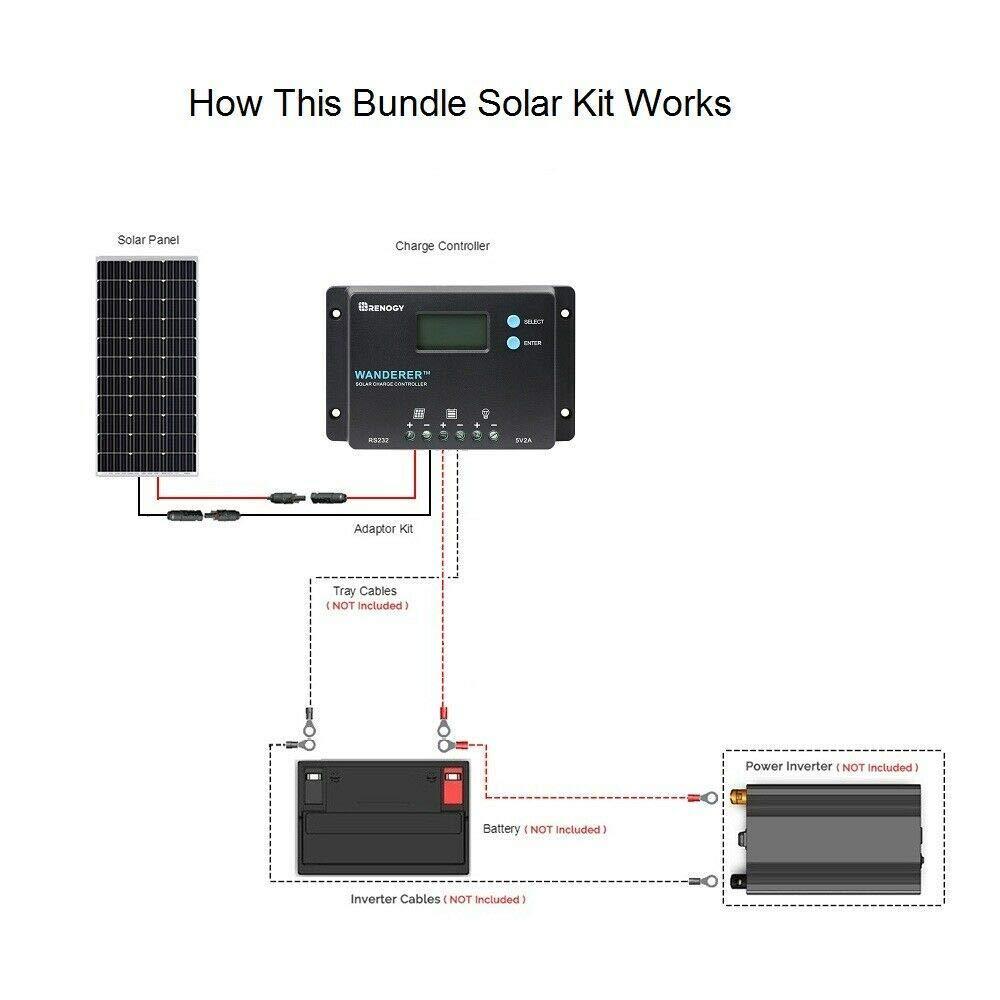
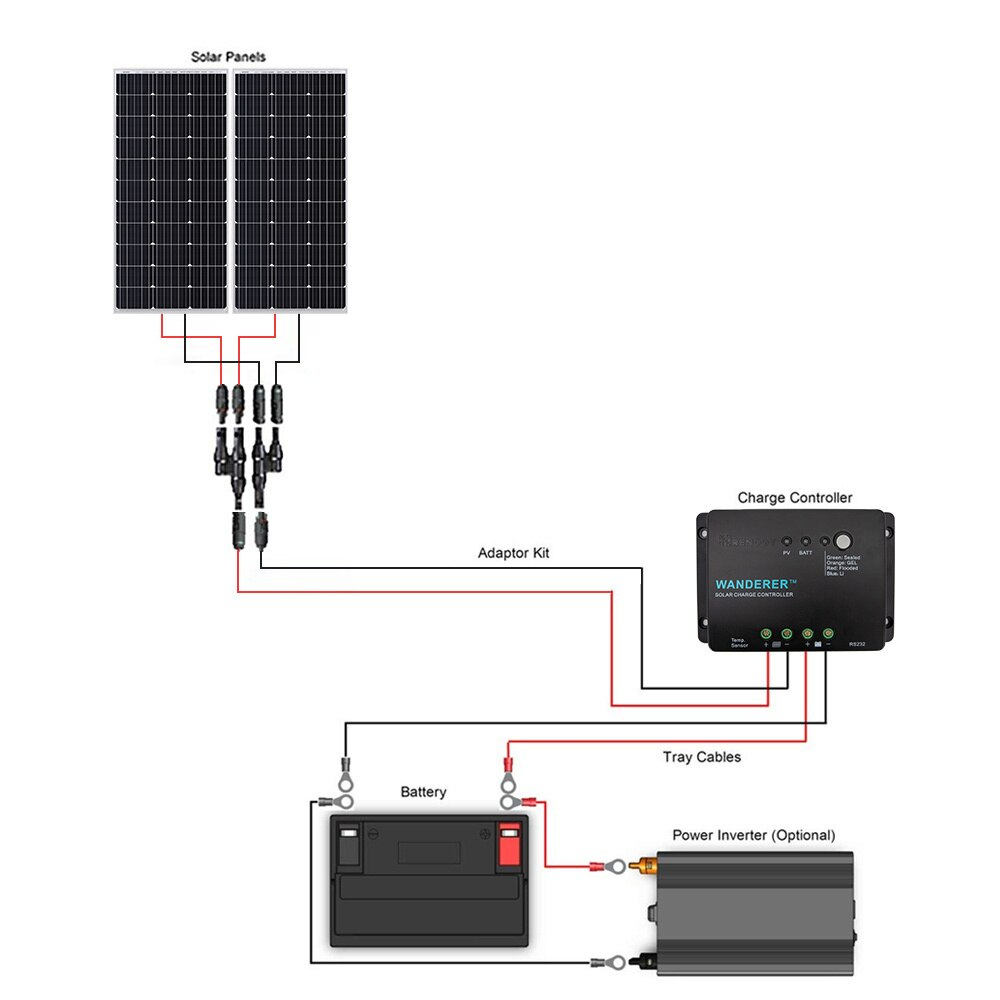
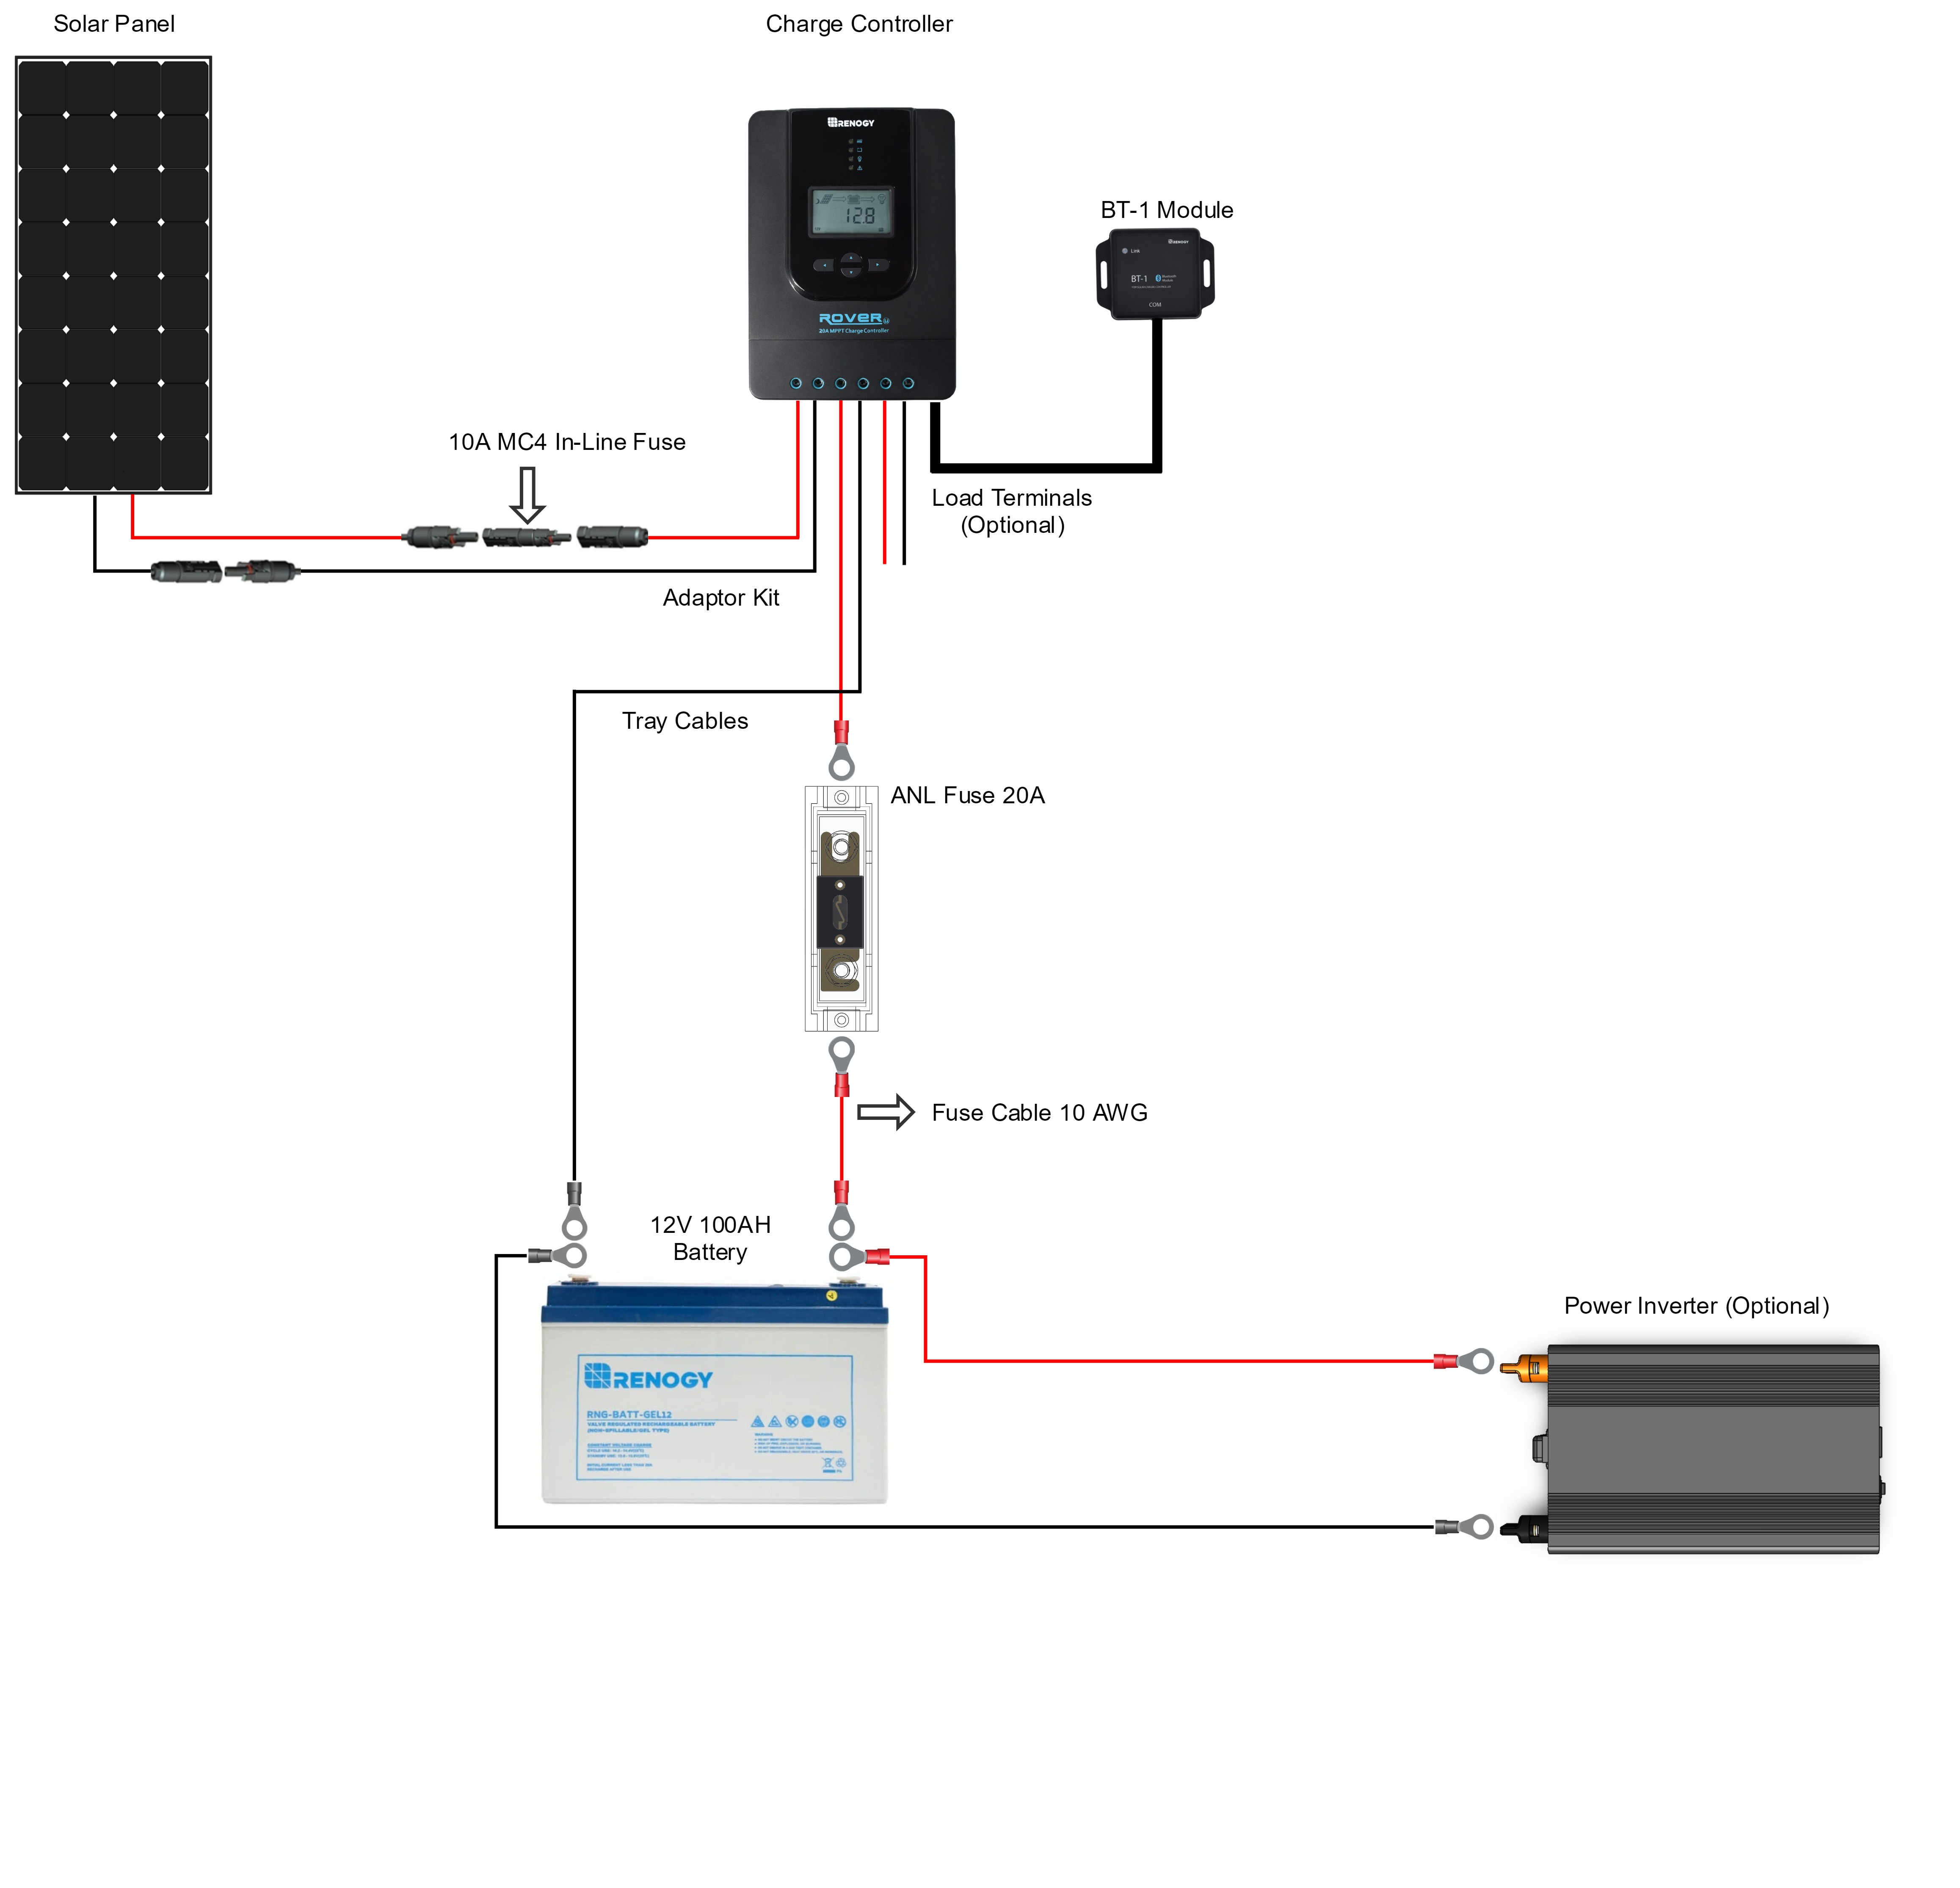
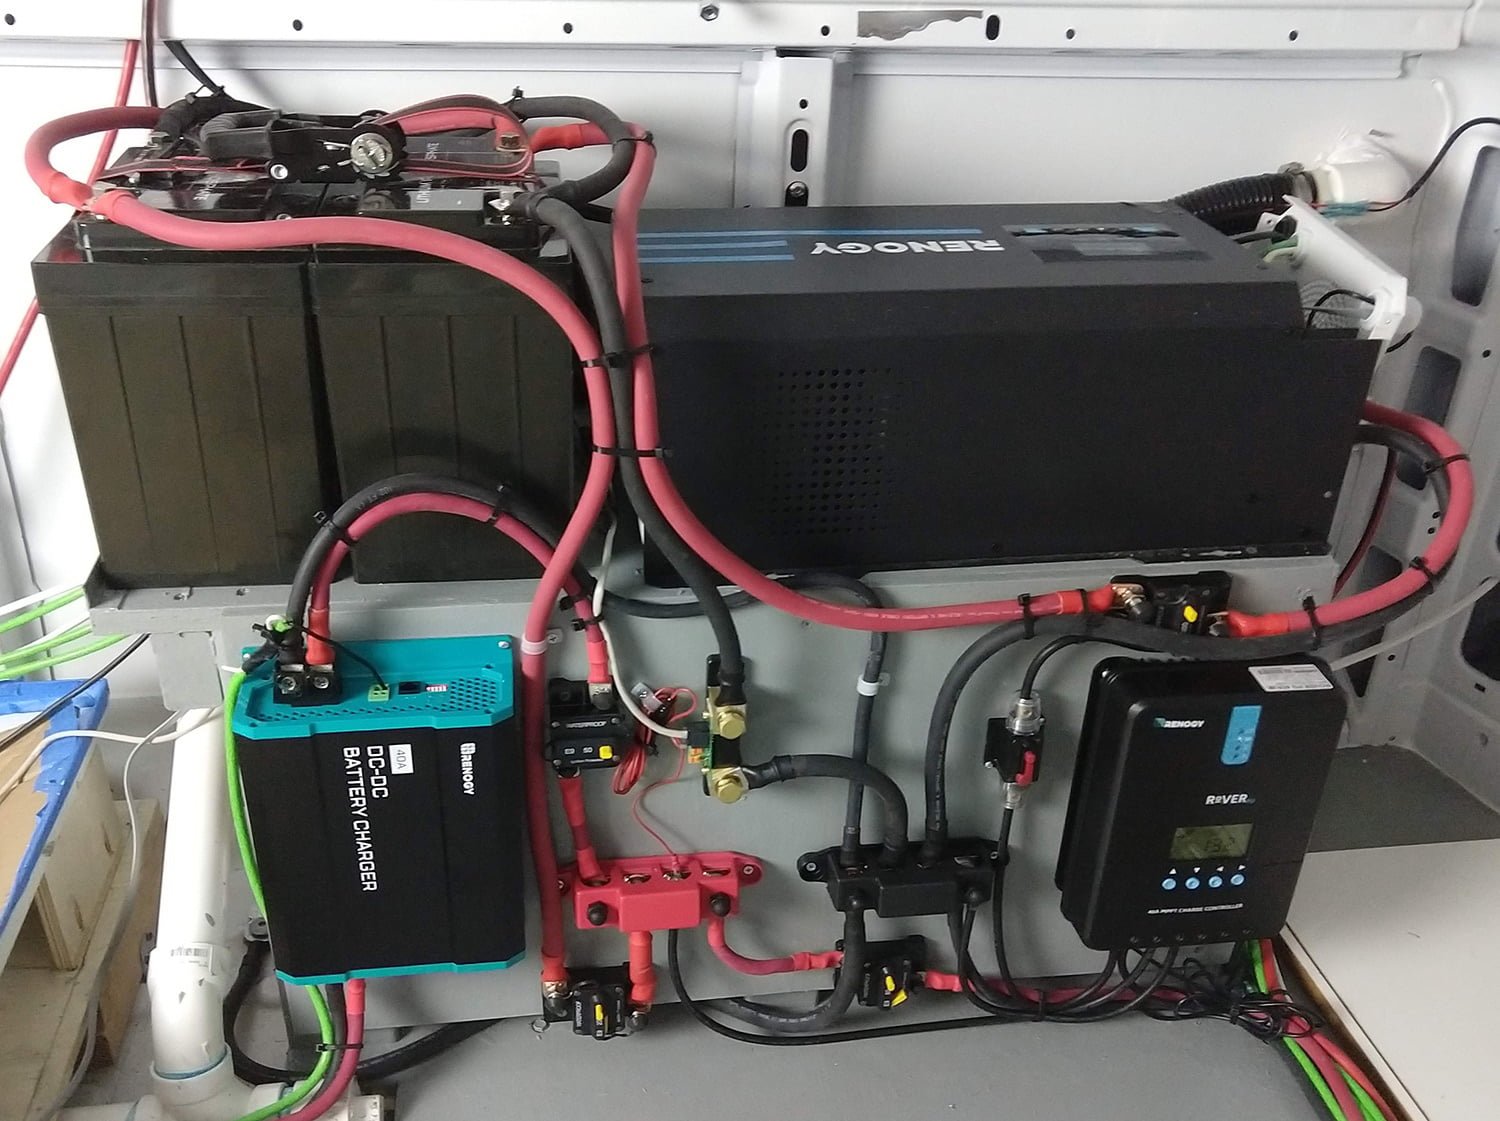
Renogy wiring diagram. Then screw on the battery rings to the battery. Renogy sells an array of cables to pair with our products including extension cables. Of accessories so that you can get the most out of your solar system. This post has no tag. You could use our tray cable or any general stranded copper core wire to connect the two. Each battery has 100 amp hour of capacity and they are wired in parallel to provide a total of 200 amp hours of usable capacity.
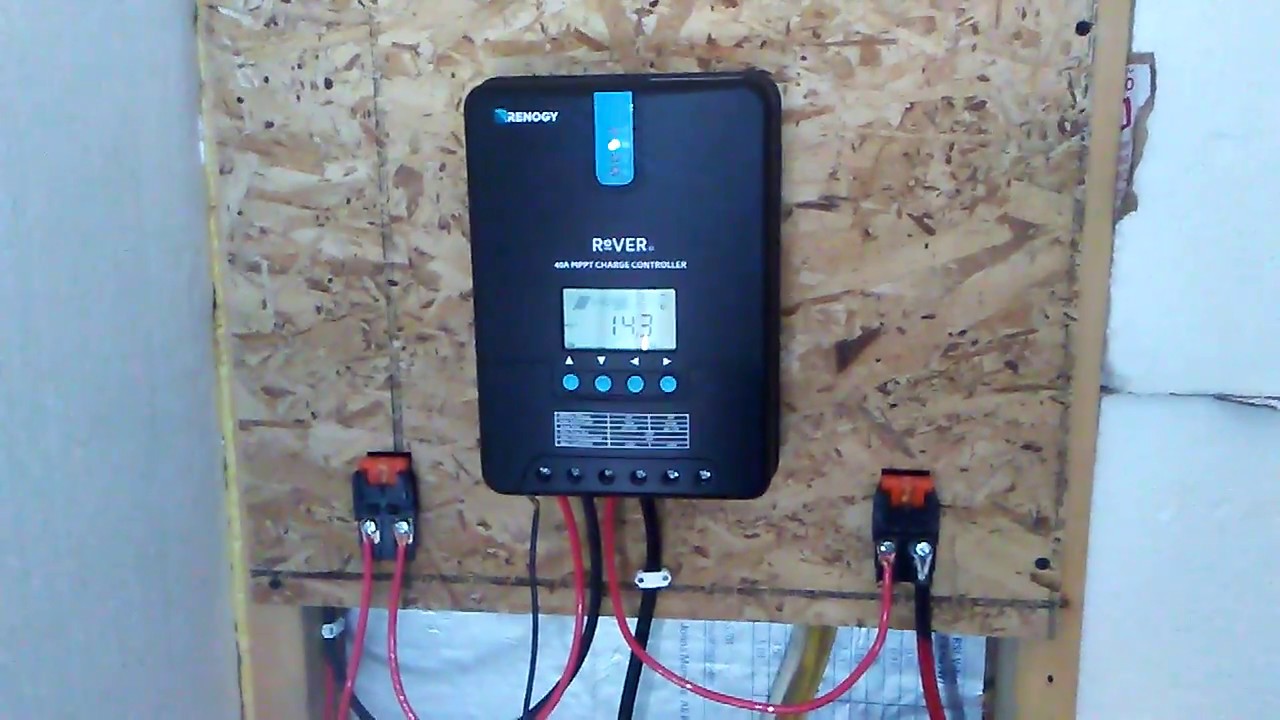
Renogy now sells a 60 amp. Each component ought to be placed and linked to different parts in particular way. Make sure that you lead the wire into the battery terminal of the charge controller and match the and to the battery and. Youll need to know the optimum operating voltage and optimum operating current of your solar array as well as wire length from solar array to your charge controller. To know what size cable to use with your system we recommend using the renogy solar cable calculator. I detailed the electrical system in miles van camper v3 in this pdf wiring diagram.
Choose from our selection of fuses mounts brackets and tools to complete your solar setup. Stay tuned for the videos in the mean time check this out. Make sure to screw in the exposed wire tightly inside the controller terminal. Wiring diagram renogy wiring diagram renogy 200 watt wiring diagram renogy 400 watt wiring diagram renogy rover wiring diagram every electrical arrangement is made up of various distinct pieces. Renogy offers a wide variety. Components and materials used.
2x renogy lithium iron phosphate batteries. Lots of you have asked so we thought wed give you a sneak peak at the schematic for the thr renogy 400w solar system wiring diagram.
Gallery of Renogy Wiring Diagram